|
Finishing work: Sun / Moon rise set assembly - November 2017 This month the final detailing is done on the sun/moon rise-set assembly. The glass dial and sun horizon shutters.
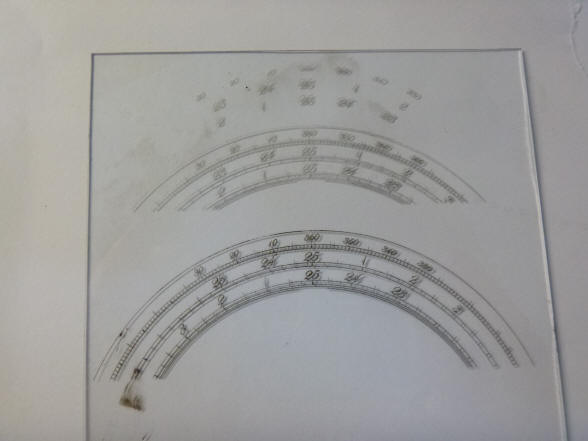
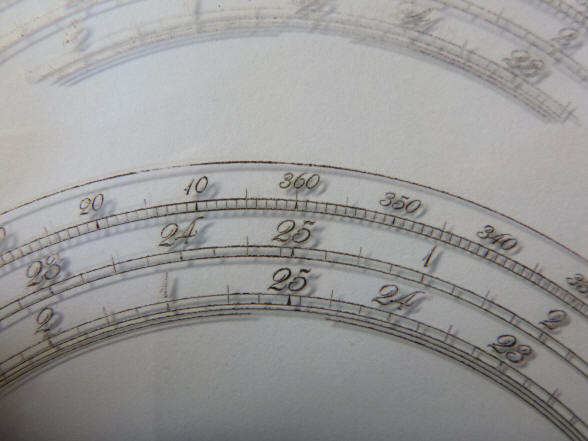
This is the initial
trial of the laser etching for the dial. It still needs some refining and
was done at a local sign company, not a specialty shop. The inking of the
numbering also tends to blur a bit around the perimeter of the figures.
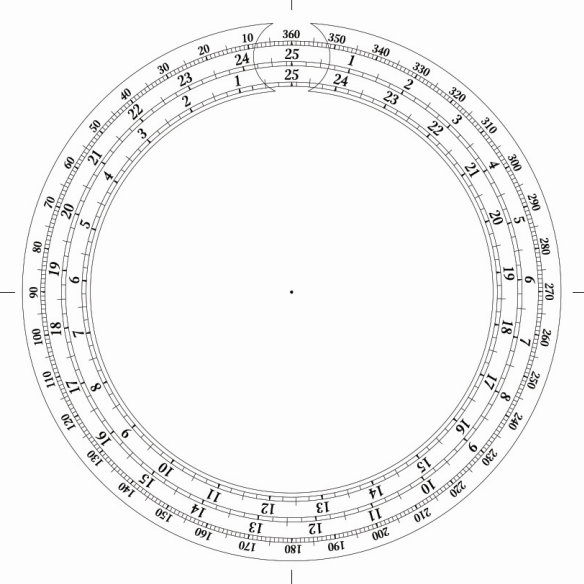
Buchanan sent to me two
options for the glass dial inscriptions. The first illustration is the
original submission, but we agreed that the italicized script was not as
legible as the second design using a block style. Furthermore, the
references to the Sun are in a script style in this dial, while the Moon is
in a block design, so this also adds to continuity.
A few glass samples
arrived today for the sun horizon shutters; these are shown both laying on a surface and more importantly
off the surface to allow the color to show through transmitted light. We
both agreed that the lighter one was the better choice.
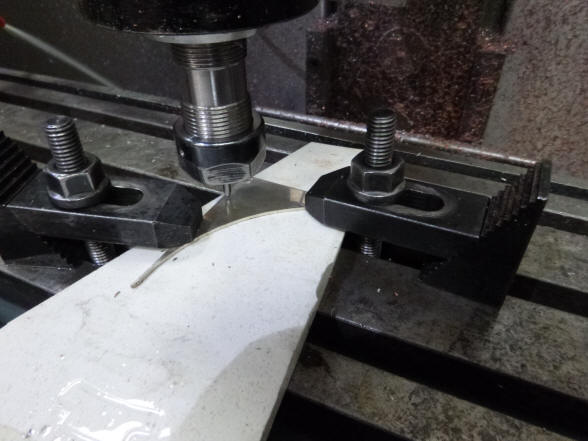
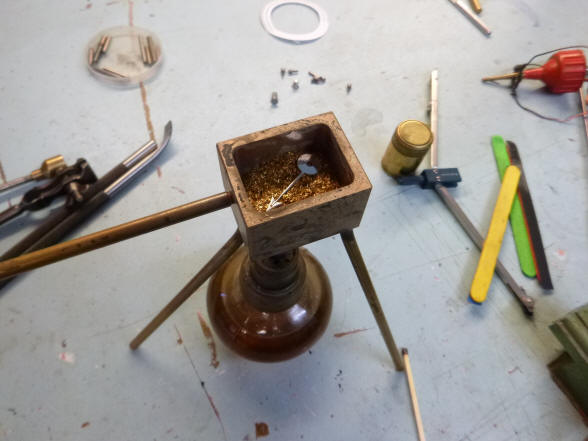
After several attempts, we were able to locate the right color of glass in the very thin, 1.1 mm (0.043 inch) stock needed to fit within the tight confines of shutter mechanism. This was sourced from China. Next the glass is secured to a thicker scrap glass for cutting in the mill. One can just see the outline of the semi-circular shutter.
Several pieces are now
complete, first photo. Buchanan will make a few spares in case of breakage. I
had thought that there could be some confusion with the color of the glass
being a sky-blue color even though they are on the lower sector where the
sun will slide behind. A darker
blue or deep purple would have conveyed a nighttime impression, but then the
parts located behind would not be seen. This, in my opinion, was essential
and the main reason why we went with a clear glass main dial as well as
glass for these horizon shutters. I thought that the addition of stars would
impart the right information that these were representing the night time
section of the dial. My original idea was to simply have a set of stars
laser etched onto the glass. These would have shown up as a white frost
against the blue background. But once again Buchanan is ahead of me with a more elegant idea.
The second photo shows a test star made of brass, no bigger than a match
head. Certainly nicer than a flat, etched design!
Notice that each star
is unique and are scattered in a random fashion.
 
The artwork is now
begun for the remaining dial work including that for the sun/moon
complication. We have the hour and minute sidereal
dials, thermometer, strike select, redo of the sunrise/sunset, world
time/demo, differential sector plates and repeat button-two pieces. I hope
the
enameller in China can accurately match the background white color and
artwork style from the last batch made in June of 2013.
The dial rings are cut and the curved contour is milled on the lathe. The dials are now complete both in their dimensions as well as the curved surface to match the existing completed dial set. 
 The first photo shows the sector plaques for the two variable differentials in the moon complication as well as the world time/demo dial. Next photo shows the Projection sector dial mockup positioned where it will be on the poising weight for the slant wheel. The rest of the brass that extends past the plaque will later be trimmed to match. Notice the scalloped edges match the same style as those sector dials used for the pendulums.
It looks like the day
after a confetti party!
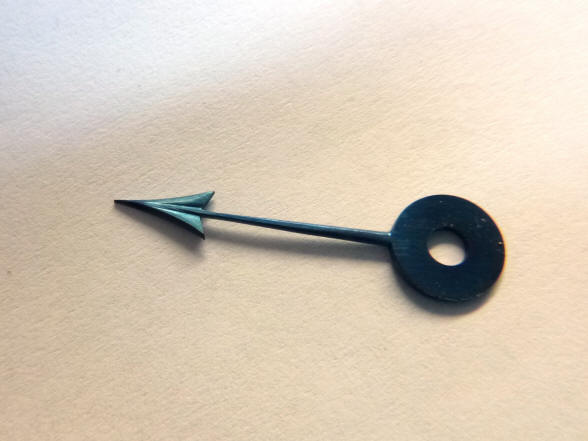
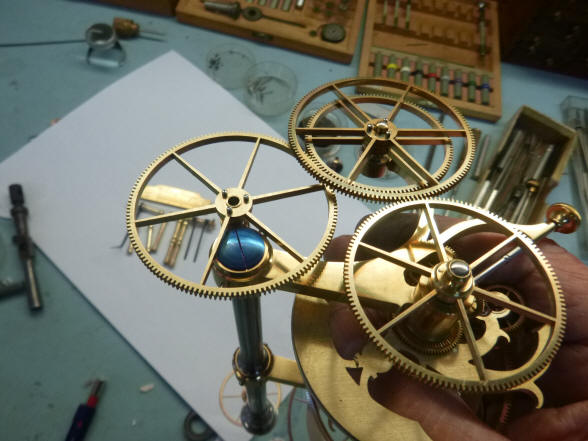
Now begins the fabrication of the moon. In keeping with using only natural materials for the planets, moons and sun we chose ebony and mammoth ivory. An old school pointer was scavenged for the ebony and the ivory is from the stock purchased in March of 2016 for the Earth globe in the tellurian. The ring in the second photo is the age of moon indicator.
The fabrication is not straight forward since we have decided to have the moon’s age dial ring countersunk into the globe. Had we decided on the easier route of having the ring secured to the surface we could have simply made a single sphere from two mated hemisphere materials. Instead we have to make two hemispheres that will join where the ring will reside. First the ebony and ivory are glued together. But to ensure that there will never be a problem with these materials separating, an internal structural retaining ring will be inserted in the interior circular recess, second photo.
The retaining rings are
inserted in the first photo, next the pieces are turned to their correct
proportions before final finishing into a sphere.
Next the edges are
turned to make a countersink for the moon’s age dial ring. The second photo clearly
shows the area where that ring will be.
The age ring is positioned within the rough material. Next the part is prepared for final spherical turning.
Next the process of making the two hemispheres and in the last photo the completed moon with its age ring. This will later be silvered. Countersinking the ring allowed us to have the maximum diameter moon within the confines of the opening within the glass dial.
The moon is now mounted
within the dial assembly.
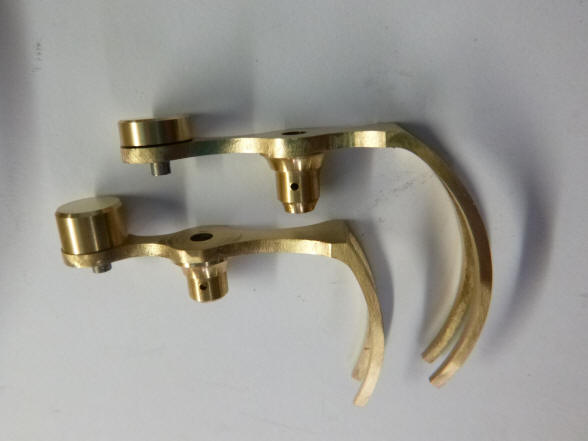
Here the sickle levers
in the variable differentials begin their final hourglass form. The large
rectangular poising weights are now replaced with small buttons.
The main support stainless steel pillar for the differential assembly now has its decorative turning and polish. The setting dials are silvered.
The decorative turning and finishing of main frame pillars.
First the finished finished pillar set. Next a blued screw; this electric blue color is what I am looking to see for the entire compliment of screws.
The pillars are now
installed within the main frame and the unit is ready for reassembly. The
first photo is the front of the main frame and the next from the rear.
The variable
differential unit is now fitted to the rear of main frame.
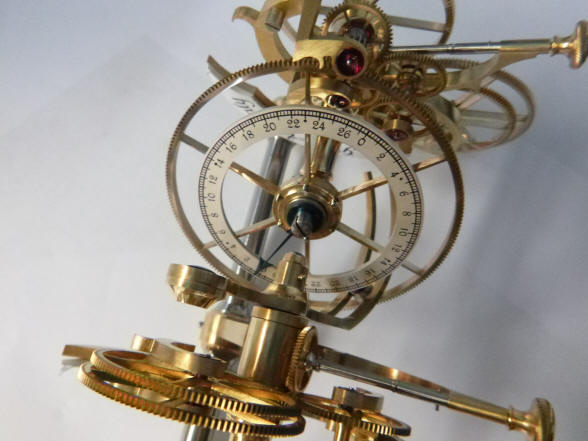
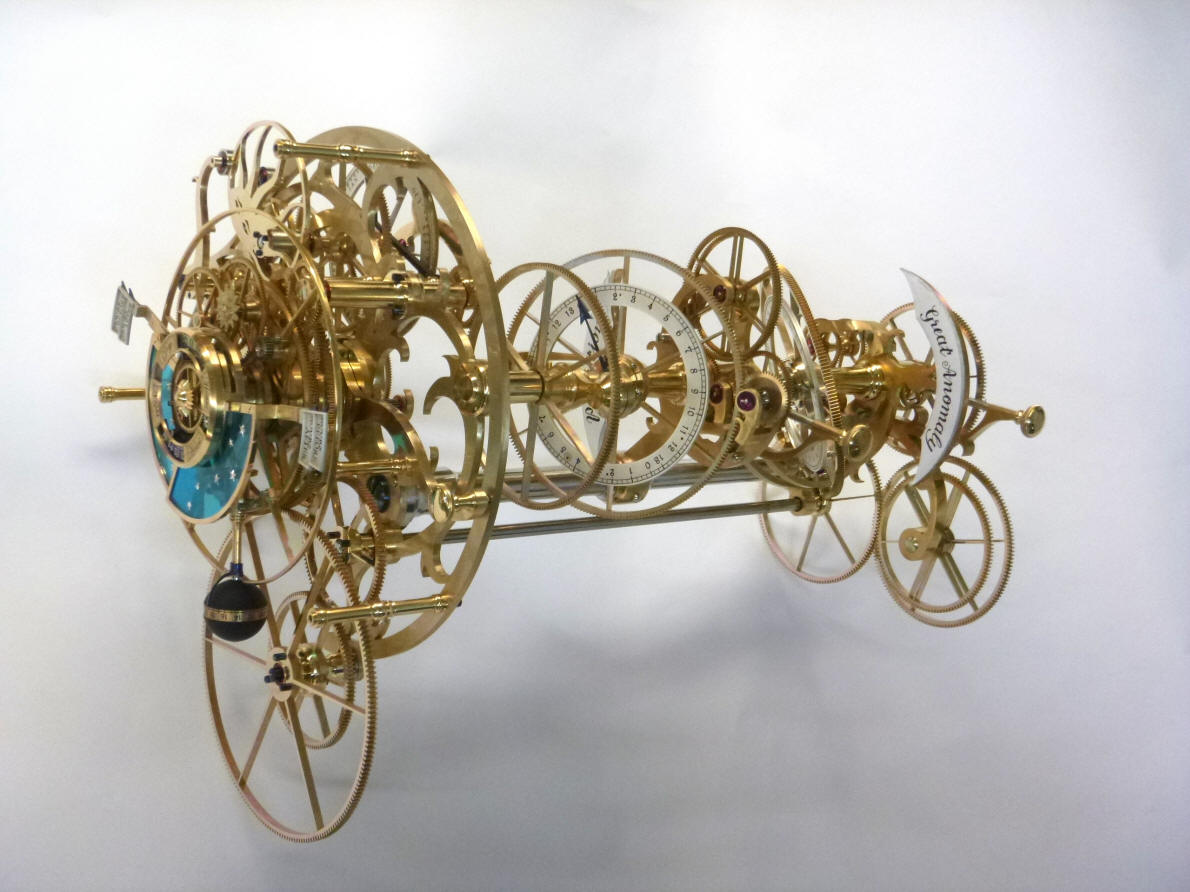
The dial subassembly is
now fitted to the front of the main frame and the completed assembly shown
in a front three-quarter elevation. The only piece yet to be done is the
engraved glass dial and bezel. Then the addition of an enamel dial. There
are approximately 655 parts, nearly 100 parts more than the perpetual calendar which sits to the left
on the movement.
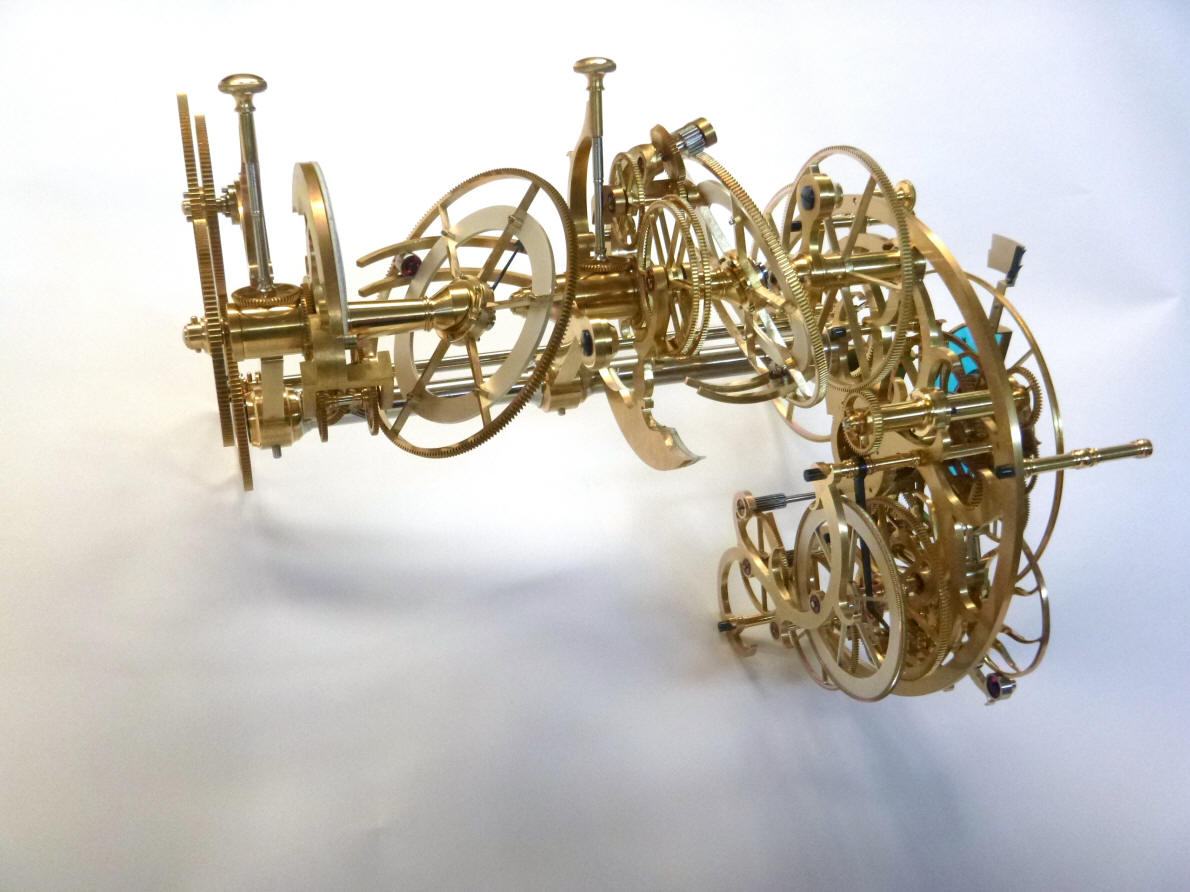
Rear three-quarter
view.
Front elevation. Can you see the sun rise shutter cam looking like Mr. Sun giving a "Peek-a-boo" from behind the outer rim of the main dial?
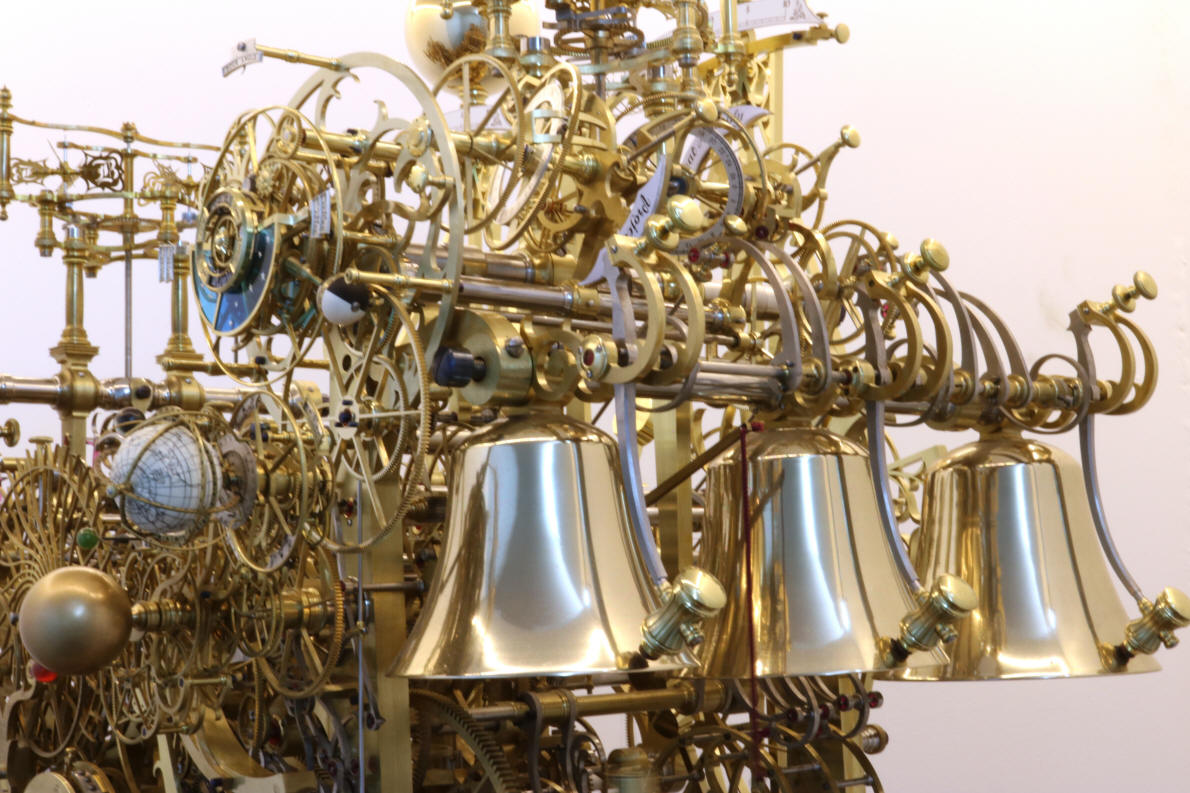
The assembly now crowns the
upper right quadrant of the machine and largely fills the area across the top
of the bell works.
Here the reworked outer
bezel mock up and inner enamel dial are installed.
|


![]()
![]()
![]()